7.5. Working with Content Libraries
7.5.1. Content Libraries Overview
In Studio, if you have course creation privileges, you can create a content library to build a pool of components that can be used in randomized assignments in your courses. You can add HTML components, problems, and video components to a library. Peer assessment and discussion components are not supported in content libraries.
Note
Content libraries are available only for courses that have course
identifiers in this format: {key type}:{org}+{course}+{run}. For example, course-v1:edX+DemoX+Demo_2015. Your course identifier appears in the browser address bar as the final part of the URL when you open your course in Studio. For more details, see Create a New Course.
After creating a library and adding components to it, if you have enabled content libraries in your course, you can use these library components in randomized assignments in your course. You do this by adding a randomized content block to a course unit and indicating one or more libraries from which the randomized content is to drawn, as well as the number and type of problems that each student is assigned. If you specify more than one library from which to randomly draw components for the randomized assignment, the content from all specified libraries is combined before the random selection is made.
Libraries have separate users and levels of access from courses. Initially, only the person who created the library has access. She can add other users to the library. For details, see Give Other Users Access to Your Library. The libraries that you create or have access to are listed on the Libraries tab on the Studio Home page.
See the following sections for details about creating and managing content libraries.
- Enable Content Libraries
- Create a New Library
- Add Components to a Library
- View the Contents of a Library
- Edit Components in a Library
- Give Other Users Access to Your Library
See the following sections for details about using content library components in a course.
7.5.2. Create a New Library
Use content libraries to build a pool of components that can be used in randomized assignments in your courses. You can create content libraries if you have course creation privileges.
For information about adding other users to a library after you create it, see Give Other Users Access to Your Library.
To create a new content library, follow these steps.
Log in to Studio.
Click New Library.
Enter the required information for your new library, then click Create.
Note
Enter new library information carefully. The values in these fields become part of the URL for your library, therefore the total number of characters in the Library Name, Organization, and Library Code fields must be 65 or fewer.
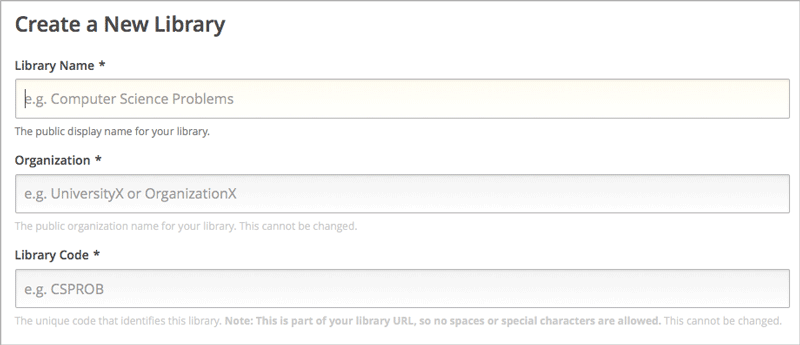
- For Library Name, enter the public display name for your library. Choose a meaningful name that will help you and other course team members to identify the contents of the library. For example, “Level 200 Math Problems”.
- For Organization, enter the identifier for your university. For example, enter HarvardX or MITx. Do not include spaces or special characters.
- For Library Code, enter an identifier for your library that is unique within your organization. This code becomes part of the URL for your library, so do not include spaces or special characters in the code.
- Click Create.
You see the new library, to which you can now add components. For details about adding components to a library, see Add Components to a Library.
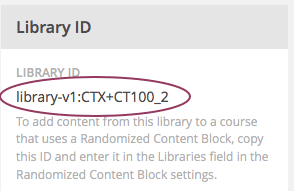
The system-generated Library ID for the new library appears in the sidebar.
Note
Copy or make a note of the Library ID for the new library. When you add a randomized content block to a course unit, you use the Library ID to specify this library as a source for the randomized content.
7.5.3. Edit a Library
After you create a library, the only change you can make to the initial library information is to the name. However, at any time, you can make changes to the components in your library, including adding or deleting components or editing the settings of components. For details about editing the contents of a library, see Edit Components in a Library and Add Components to a Library.
To change the name of a library, follow these steps.
Log in to Studio.
Click Libraries, then click the library whose name you want to edit.
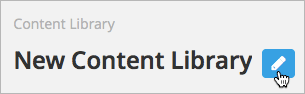
Click the Edit icon next to the library name.
The library name field becomes editable.
- In the library name field, make edits or enter a new library name.
- Click anywhere outside the library name field to save your changes.
For details about giving other users access to the library, see Give Other Users Access to Your Library.
7.5.4. Add Components to a Library
To add new components to your library, follow these steps.
- Log in to Studio.
- Click Libraries, then click the library that you want to add components to.
- Click Add Component, then click the component type that you want to add under Add New Component.
For more information about the types of components you can add to a library, see these topics.
After you add a component to a library, you can edit its settings. These settings are retained when the component is selected from the library and used in a course.
When a component from the library is used in a randomized content block, you can further edit the component as it exists in the unit, without affecting the original version in the library. For details, refer to Edit Components in a Library and Getting the Latest Version of Library Content.
7.5.5. View the Contents of a Library
To view the entire contents of a library in Studio, follow these steps.
- Log in to Studio.
- Click Libraries, then click the library whose components you want to view.
The components in the library display in the order in which they were added, with the most recently added at the bottom. If your library has more than 10 components, additional components are shown on other pages.
The range of the components shown on the current page, and the total number of components, are shown at the top of the page.
You can navigate through the pages in these ways:
Use the < and > buttons at the top and bottom of the list to navigate to the previous and next pages.
At the bottom of the page, you can edit the first number in the page range. Click the number to place your cursor in the field, then enter the page number you want to jump to.

To view the list of matching components in the library, see View the Matching Components in a Randomized Content Block.
To view the randomized content as a student would see it, see View the Randomized Content as a Student.
7.5.6. Edit Components in a Library
After you have added components to a content library, you can edit, duplicate, or delete them.
For step-by-step instructions for editing, duplicating, or deleting components, refer to the following topics:
Note
If you modify components in your library that are in use in a course, these updates in the “source” library are not reflected in the course unless you manually update the randomized content block in the course unit. For details about updating library components used in your course to match the latest version in the content library, see Getting the Latest Version of Library Content.
7.5.7. Delete a Library
You cannot delete a library. Instead, you can discontinue use of an unwanted library. To do so, first make sure that none of its components are in use in any courses, then delete all components in the library. You can also edit the name of the library to make it clear to other course staff that the library should not be used as a source of randomized assignment content in courses.
For details about deleting components in a library, see Edit Components in a Library.
7.5.8. Give Other Users Access to Your Library
When you create a library, you are automatically assigned an Admin role in that library.
You can give other Studio users access to your library. Depending on the level of access that you give them in the library, additional library users can view and use library content in courses, edit library content, or add and manage other library users. All users to whom you give library access must be registered with Studio and have an active account.
These are the levels of access for libraries:
- User – Users can view library content and can use library components in their courses, but they cannot edit the contents of a library.
- Staff – Staff can use library components in their courses. In addition, as content co-authors, they have full editing privileges in a library.
- Admin – Admins have full editing privileges for a library. In addition, they can add and remove other team members from library access. There must be at least one user with Admin privileges in a library.
Note
The levels of access for libraries are hierarchical. You can add new library members only with the User level of access, after which you can give them the Staff level of access. You can give the Admin level of access only to people who already have the Staff level of access.
7.5.8.1. Add a User to the Library
To grant a user initial User access to a library, follow these steps.
Note
Only library users with the Admin level of access can add users to the library.
Ensure that the new library member has an active Studio account.
On the Studio home page, click the Libraries tab and locate the library to which you are adding this user.
From the Settings menu select User Access.
On the User Access page, click Add a New User.
Enter the new user’s email address, then click ADD USER.
The new user is added to the list of library members with the User level of access.
7.5.8.2. Remove a User from the Library
You can remove users from the library at any time, regardless of the level of access that they have.
To remove a user from the library, follow these steps.
- In Studio, click the Libraries tab and locate your library.
- From the Settings menu select User Access.
- On the User Access page, locate the user that you want to remove.
- Hover over the user’s box and click the trash can icon.
You are prompted to confirm the deletion.
- Click Delete.
The user is removed from the library.
7.5.8.3. Add Staff or Admin Access
The levels of access for libraries are hierarchical. You can add new library members only with the User level of access, after which you can give them the Staff level of access. You can give the Admin level of access only to people who already have the Staff level of access.
To give a library member a higher level of access to the library, follow these steps.
- In Studio, click the Libraries tab and locate your library.
- From the Settings menu select User Access.
- On the User Access page, locate the user to whom you are giving additional privileges.
- If he currently has User access, click Add Staff Access.
- If he currently has Staff access, click Add Admin Access.
The user’s display listing is updated to indicate the new level of access. In addition, their listing now includes a button to remove their current level of access and move them back to their previous level of access. For details about reducing a user’s level of access to a library, see Remove Staff or Admin Access.
7.5.8.4. Remove Staff or Admin Access
After you have granted users Staff or Admin access, you (or other Admin library users) can reduce their levels of access.
To remove Staff or Admin access from a library user, follow these steps.
In Studio, click the Libraries tab and locate your library.
From the Settings menu select User Access.
On the User Access page, locate the user whose access level you are changing.
- If she currently has Staff access, click Remove Staff Access.
- If she currently has Admin access, click Remove Admin Access.
The user’s display listing is updated to indicate their new role.
Note
There must always be at least one Admin for a library. If there is only one user with the Admin role, you cannot remove him or her from the Admin role unless you first assign another user to the Admin role.